Autumn Creamy Vegan Butternut Squash Soup

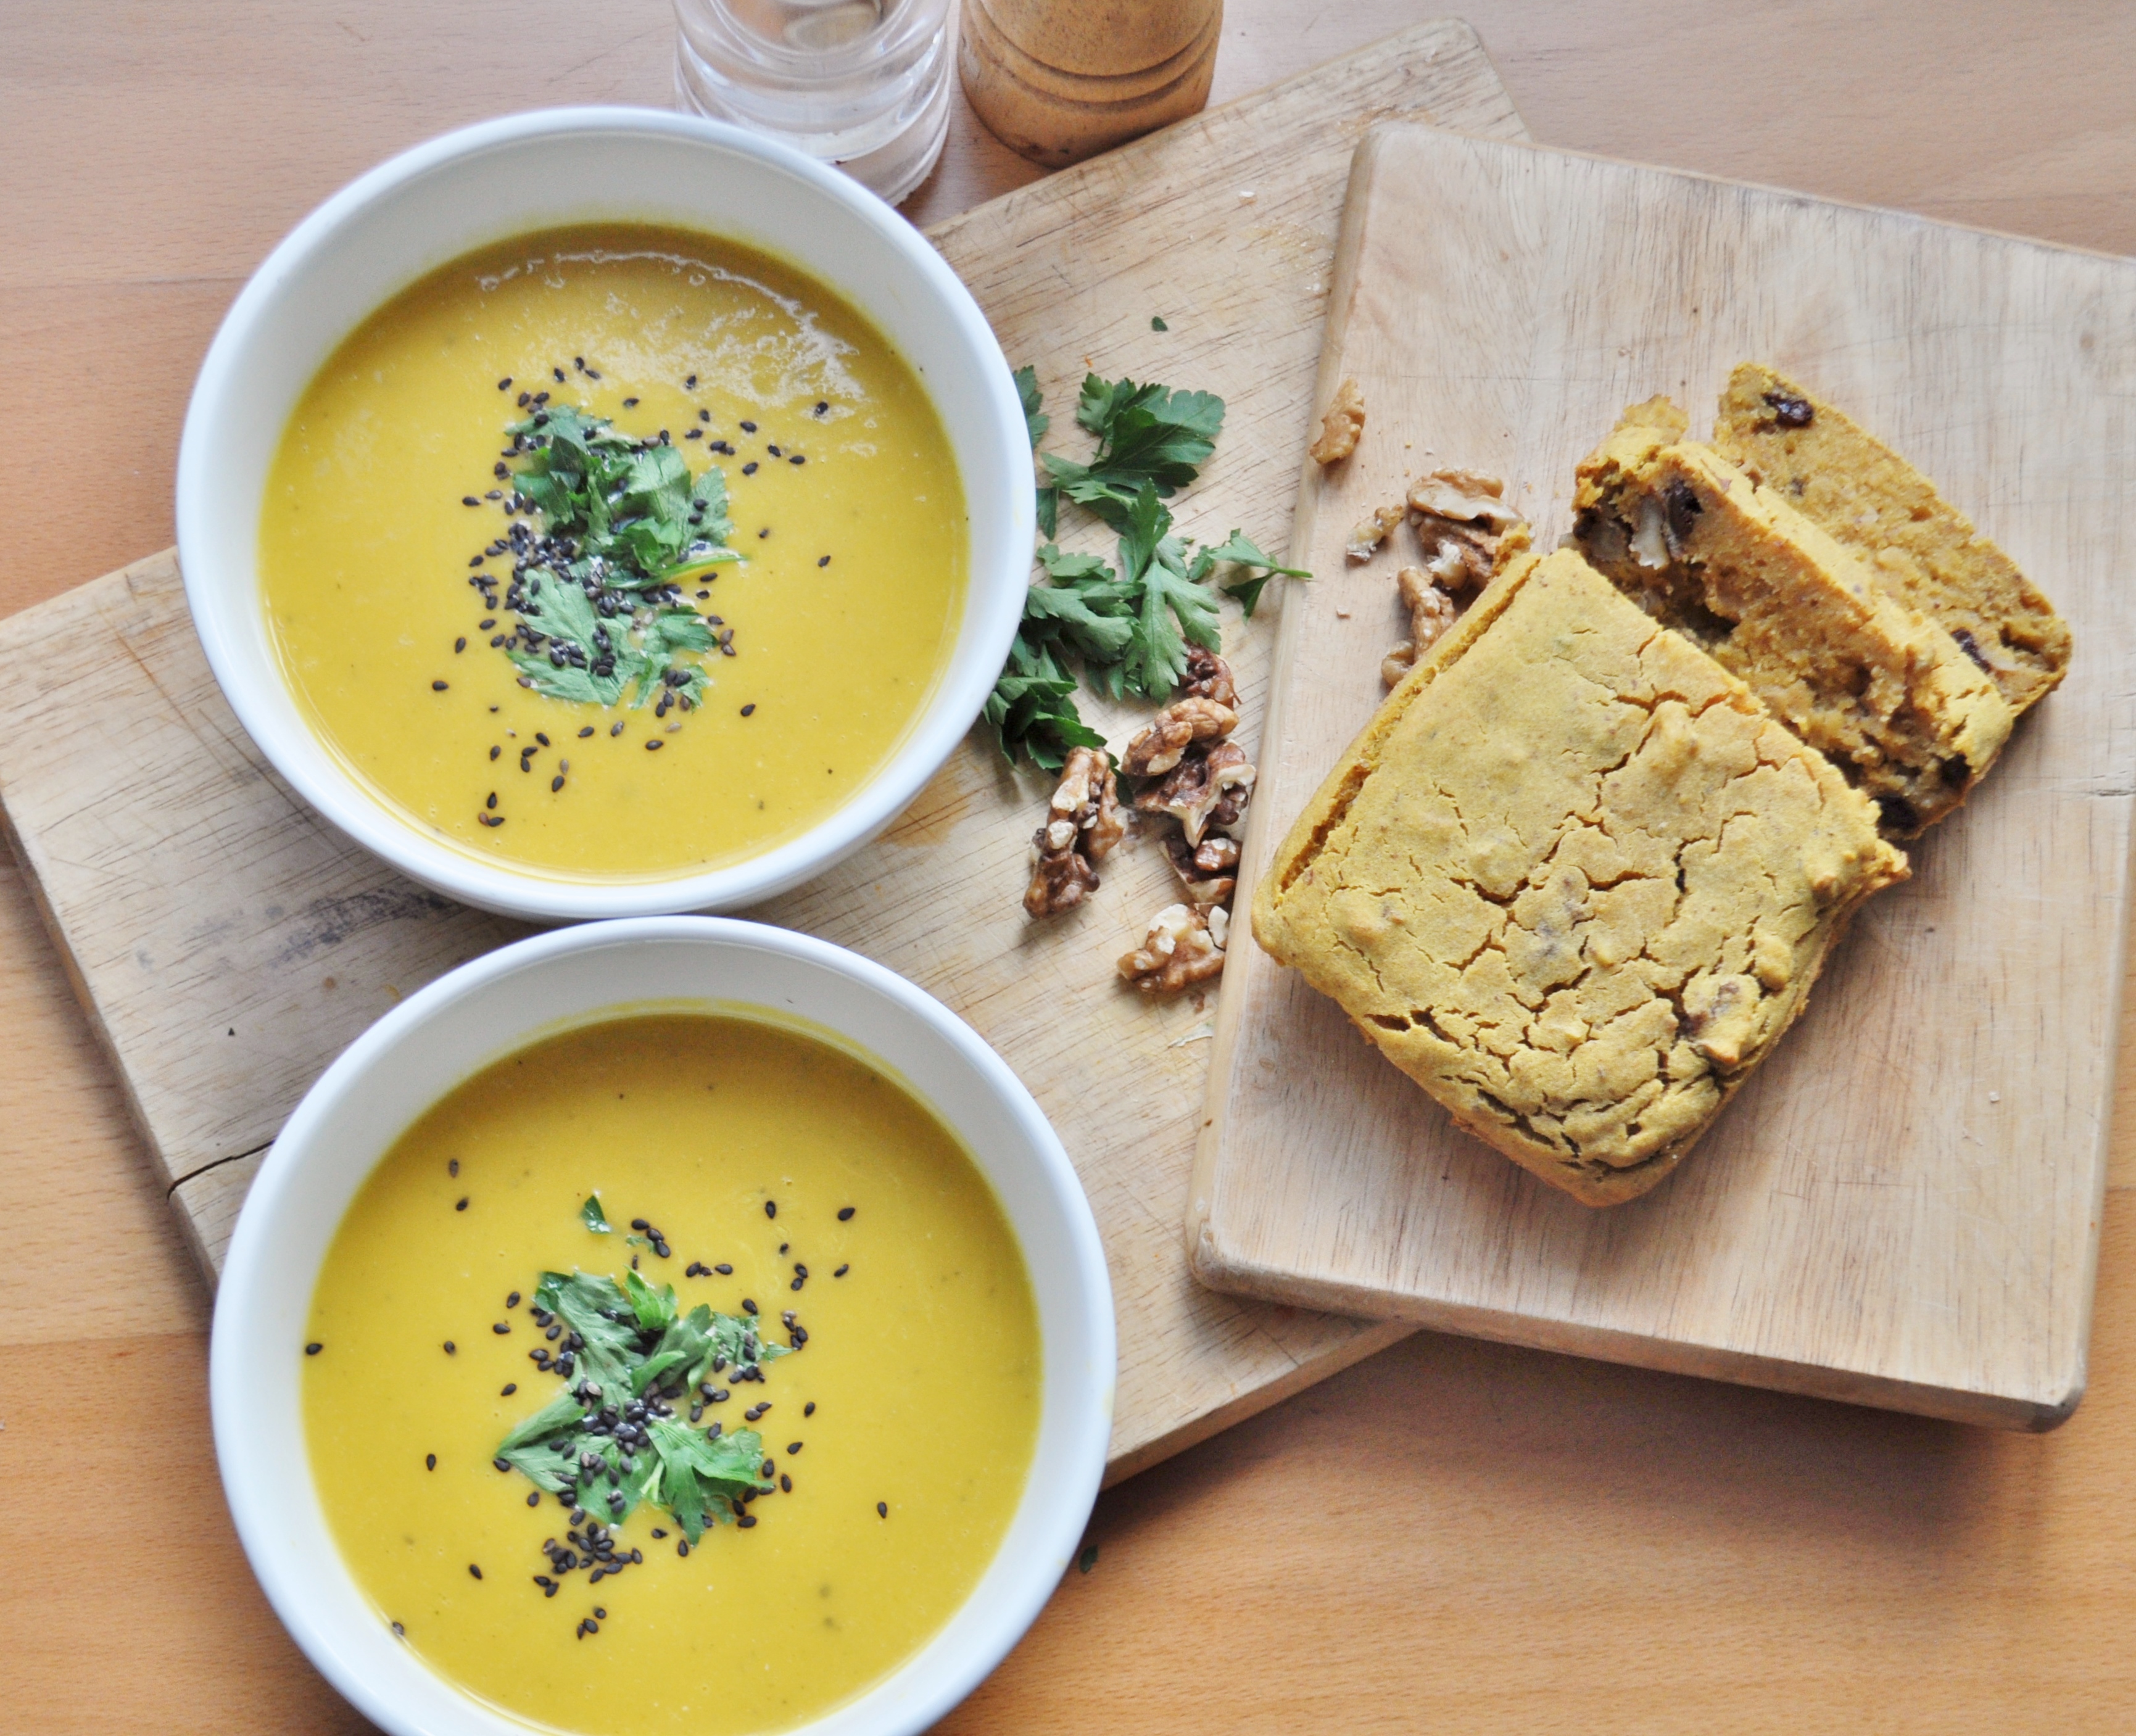
I have spent the summer without an oven. That’s right – due to a gas leak in our building in April, I have been without my beloved hot box for many months. Is that a good enough excuse for my absence? Well Autumn is here, and I ain’t gonna let the lack of a still-absent and vital appliance get me down – so I have done what most desperate and hungry indoor Sunday dwellers do when the weather turns – make a creamy orange-coloured soup to devour with hot crusty bread; or in my case, a gluten-free bread made with left over squash!

DSC_0207

DSC_0200 (2)

  • Half one large butternut squash, cut into chunks
  • 1 large stalk celery, chopped
  • 2 medium carrots, chopped
  • 1 onion, diced
  • 4 cloves garlic, peeled
  • 1 1/2 litres vegetable stock
  • dash each of curry powder, turmeric, ginger, sage and rosemary
  • Salt and pepper
  • 1/2 cup silken tofu

Saute the onion, garlic, carrot  and celery in some oil over medium heat in a big pot. When they have softened, add in the butternut squash.

DSC_0195

Stir and let the squash cook for about 2 minutes before pouring in the stock

DSC_0197 (2)

Add in the herbs and spices and cook for around 30 minutes on medium to high until the squash is easily cut into. I used a hand blender to turn this into a smooth soup, or you could put into a blender. Once done, stir in the silken tofu.

DSC_0205 (2)

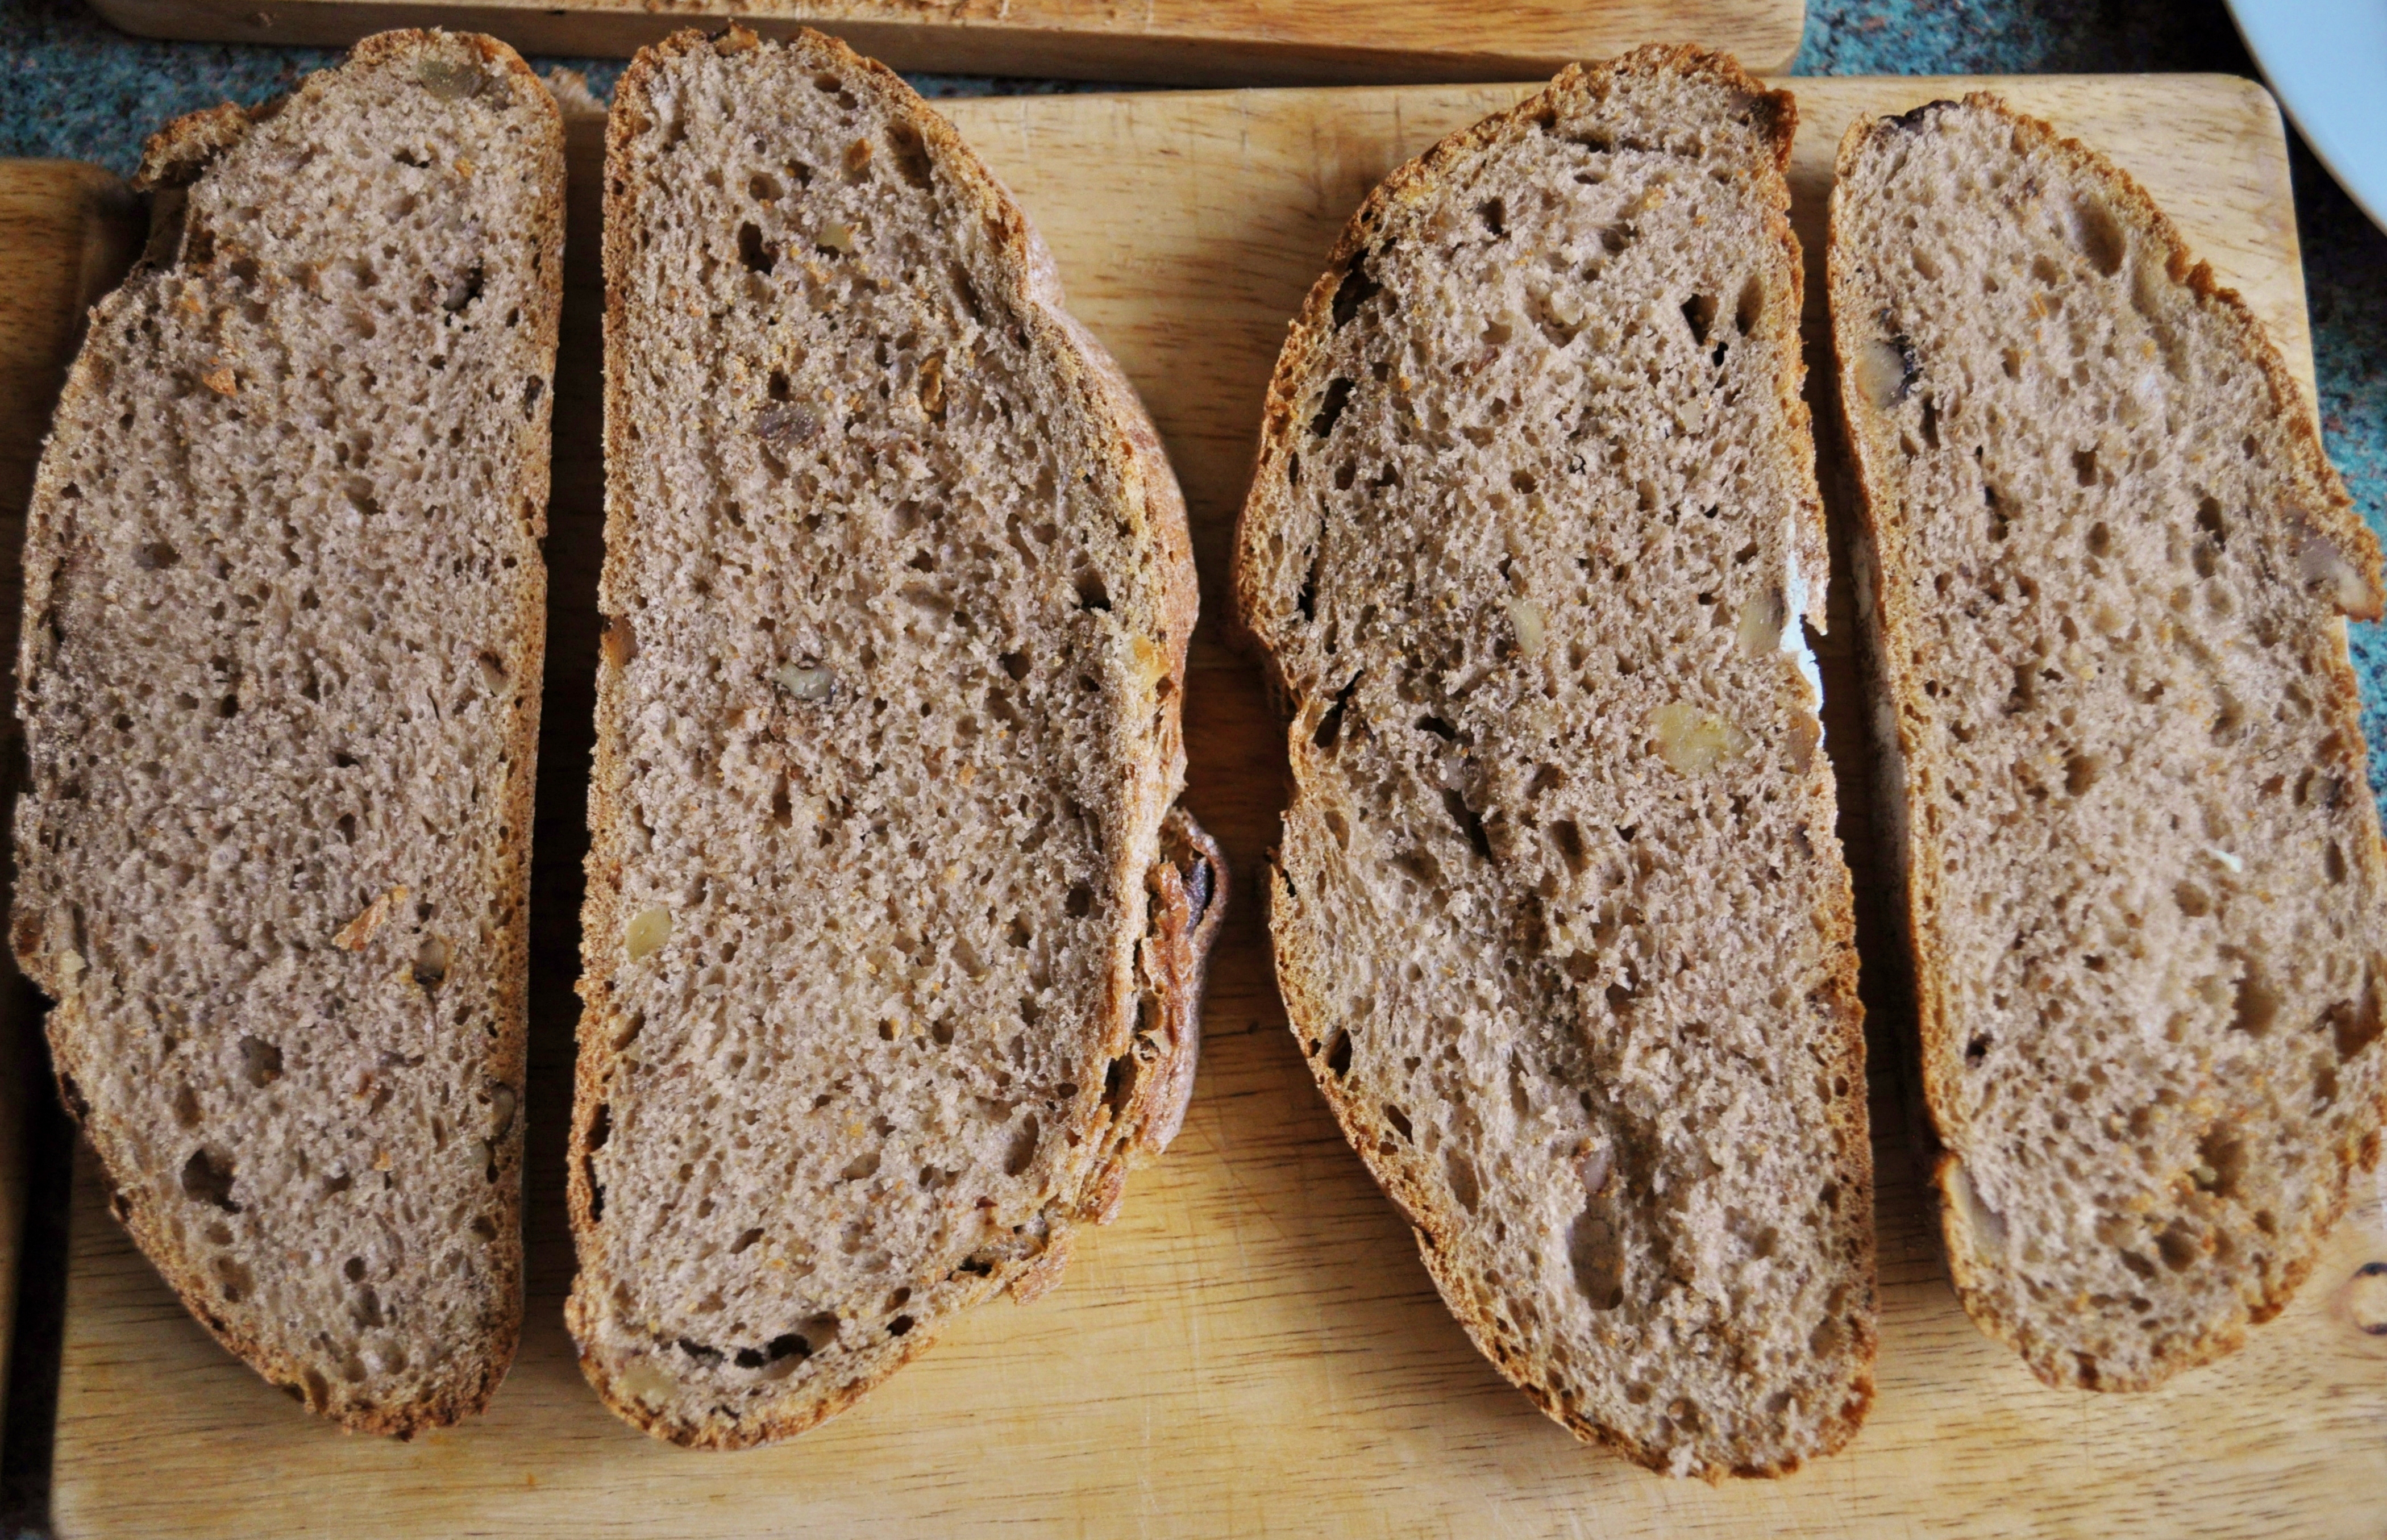
I served with fresh parsley and black sesame seeds. The bread was a version of this recipe. But I threw in some walnuts and raisins. It was lovely!

DSC_0219

This kind of meal makes me feel better about the impending approach of the cold months to come…

Vegan Burger Series: Episode Five – Aussie-Inspired Beetroot and Tofu Burger

Whilst in Australia, I noticed a big change in the food culture there. Melbourne, my home town, has always been seen as having a very  cosmopolitan, and forward-thinking view on food with hundreds of amazing restaurants, cafes, oh! and don’t get me started on the incredible coffee down there. Having said this, the move to a more compassionate food scene has been somewhat slow in parts. So I was ecstatic to see my home country going through a veggie-burger-naissance!

mosaicdd9c6c9d9b3b14e40edbbecba2471bbc648540df-1

My family and I flew up to Queensland for a week to a place called Noosa (think of those Australian tourism ads with the never-ending white beaches, that’s it:)) This is where i came across one the BEST veggie burgers I’ve had – a huge statement! It was at a cafe called Jimmy Foxx and the creator of this heavenly burger was kind enough to give me the recipe.

  • 2 cups cooked quinoa
  • 1 cup tofu, diced
  • 2 cups grated raw beetroot
  • 250g cooked Bulgar wheat
  • 1 onion, diced
  • 200g breadcrumbs
  • 150g Dijon mustard
  • 4 tbsp liquid sweetener (something thick, like brown rice syrup or agave)
  • Salt and pepper

DSC_0572

Method:

Super easy! You just combine all the ingredients in a large bowl, shmoosh together and form into patties. I refrigerated mine for a few hours and then cooked them on  a medium to high heat, oiled pan (a grill would be great) until brown on both sides. You should be careful, they are not meant to hold super firm.

DSC_0580

I served on a ciabatta roll with tomato and avocado. Keeping it simple is best when there is so much flavour in the patty! Looks as good as the original I say! (top photo left corner).

Whilst in Noosa, we also drove inland to the famous Eumundi markets. There are so many amazing things to be found at this place, but best of all is the food section! The picture above shows a stall that made my year – Organic vegan Burgers! I had a divine spinach and mushroom burger with homemade pesto and it was just all too much. The flavours were so intense and I only wish I could have also grabbed the recipe, but alas! a good reason to return soon 🙂

DSC_2479

Half-way through heaven.

The other photo above? – Sugar cane juice! This stuff packed one hell of sugary punch, but in the best way possible. It has a myriad of health benefits and was perfect to drink in the crazy humidity up there. Please stay tuned for more aussie-themed posts to come!

Crispy Tofu and Shiitake Mushroom Noodle Soup

DSC_0277

It’s the perfect season now for bringing out all those lovely soup recipes. Although I’ve never had to wait for a particular time of year to eat some good ol’ Asian-inspired noodle soup! This one is my absolute go-to recipe when I need something hot, tasty and slurpy! It’s very simple and actually very healthy, being low in salt and gluten-free if you use tamari. So go ahead, give this a go and if you want to make it even healthier, try rolling the tofu in breadcrumbs and baking instead of frying.

DSC_0279

Makes: Enough for 2

  • 1/2 block of firm tofu, pressed and drained and cut into cubes
  • Cornflour for rolling tofu in
  • 2 servings of your favourite rice noodle
  • 6 fresh shiitake mushrooms, quartered
  • 4 spring onions (scallions), chopped
  • 1 red chilli, de-seeded and finely chopped
  • 3 cloves garlic, crushed and chopped
  • A large piece of fresh ginger, peeled and diced finely
  • 1 large bunch choi sum (or your favourite green) chopped finely
  • Soy sauce or tamari
  • 1 teaspoon chilli oil
  • 1 teaspoon toasted sesame oil
  • Extra chilli, onions, chopped peanuts, fresh coriander and black sesame seeds for garnish

DSC_0270 DSC_0271

Method:

Pour out some cornflour onto a plate and gently toss the tofu cubes through it so they are coated well. Set aside.

Fill a medium – large pot with around 8 cups of water and set over high heat. To this add in your spring onions, chilli, garlic and ginger and when it comes to the boil, turn the heat down so it is just simmering. Now add the mushrooms. Whilst those flavours are mixing, heat some oil in a frying pan and throw in the tofu cubes. Fry them until they are golden brown on all sides, adding in a dash of soy sauce right at the end. Put to one side.

Now add your noodles to the soup, stir for a minute and then add the chopped choi sum, chilli oil, sesame oil and a little soy sauce. Cook until the noodles are soft.

DSC_0276

Distribute noodles between two bowls and pour soup over each. Top with tofu, extra chilli, onions, fresh coriander, chopped peanuts, black sesame seeds and extra chilli oil if you wish. Happy slurping!!

DSC_0285 DSC_0287

Vegan Month of Food Debrief!

mosaic932cf84b6f395fd9491a46f95ea60e4a82eaef2a

It’s over! Great timing too may I add, as today was my first day back at uni. (Final year!) I had so much fun with this Vegan MoFo, it was definitely tricky at times to get the posts out and still ensure the same detail and quality that I like to have. Looking back, I’m surprised that I had only 2 sweet recipes in there, but on second thought, time was of the essence and when I make desserts and such, it seems to take me longer to do 🙂 The following recipes were my favourite of the month so by all means take a look through and try them out – I’m still making my way through everyone elses posts and bookmarking like mad!

DSC_0134

My healthy pizza makes the list because I still can’t believe how well some simple seasoned silken tofu replaces the traditional soft mozzarella. Made with a store-bought spelt pizza crust this pizza was fast and delicious!

DSC_0076

Alicia Silverstone’s peanut butter cups have been a favourite of mine ever since I tried them! Her book The Kind Diet was my first vegan cookbook, so those recipes have a special place in my vegan heart!

DSC_1001

Although I wasn’t happy with these photos, I WAS happy with the way these spring rolls turned out. They were so fragrant and delicious with the coriander peanut pesto, they only lasted a few hours in this house.

mosaicefe407443afac06ba3b99fd8b70363ce16ffeb8a

My new favourite pasta! This rich and creamy tomato sauce blended with cashews and pine nuts is so hearty and delicious that even my fussy Italian boyfriend was singing its praises.

DSC_0209

A simple and classic eggs on toast, turned Vegan, thanks to The Vegg!

DSC_0337

A fabulous little burger this one is. Butter beans and kale in pita pockets served with sweet chilli sauce. Quick and easy to make as well!

DSC_0258

It was hard to choose my final favourite, but these gluten-free savoury pancakes won over my heart. I could eat these at every meal!

So that’s it for my first Vegan MoFo, I look forward to next year’s and I hope everyone enjoyed the posts and recipes! Now that classes have started, I won’t be able to post as often, but I am going to try and aim for at least twice a week – hey, if I can do it for a month…!

400x84_r3

A Vegan Approach to Eggs on Toast – VeganMoFo

A fellow blogger (who has a great film blog, check it out) asked me for a recipe for my egg sandwich. I can’t say no to making one of my favourite dishes, so I complied! Instead of making this the way I usually do, which is on fresh bread with salad and vegan mayo, I actually turned it into more of a breakfast meal with muffins and sautéed spinach. I have used a product here called The Vegg which is a vegan egg yolk and if you can’t get your hands on it, then this dish is still awesome, but if you can I highly recommend it. The flavour is so spot on, your taste buds will be thinking that you’re done with your vegan days!

DSC_0209

DSC_0201

Makes: Enough for one

  • 1/4 pack of firm tofu
  • Tumeric
  • 2 tablespoons prepared Vegg
  • A handful of fresh spinach
  • 1/2 avocado
  • 1 english muffin
  • Salt and pepper

Method:

First, you must drain and press you tofu. See here for the best way to do this, but only press for about 10 minutes, you still want a little bit of moisture to help give it that eggy texture. Now slice the tofu in half lengthways and using a glass, cut two round slices out of the tofu.

DSC_0181 DSC_0182 DSC_0183

Sprinkle each round with a little tumeric and rub in gently.

DSC_0184

Now heat some oil in a pan on medium-high and cook the tofu until slightly browned on each side – around 5 minutes each. Just before they are done, add to the pan your washed spinach and allow to wilt.

DSC_0188

Toast your muffins and layer the sliced avocado on top, then the spinach and tofu. Carefully carve out a small part of the centre of each tofu round and gently pour in the Vegg yolk, allowing it to cascade over the tofu and spinach, like a good yolk should 🙂

DSC_0194 DSC_0195 DSC_0198

DSC_0205

Now finish it off with some salt and pepper and dig in! This is perfect for an easy breakfast or weekend brunch.

DSC_0210

400x84_r3

Tofu Cutlet & Roasted Veg Sandwich – VeganMoFo

DSC_0040

DSC_0046

As promised! So if you saw my last post, I know you’ll just be dying of impatience, desperately wanting to see what it is that I used that lovely pressed tofu for! 😉 Well here it is – a sandwich! But this ain’t no ordinary sandwich folks, give it a go and you’ll see why.

Makes: 2 sandwiches

  • 4 slices of nice crusty bread (I used a walnut bread, so good!)
  • 1 block firm tofu, drained and pressed and then cut into four pieces
  • Approx. 3/4 cup cornstarch
  • 1 zucchini, sliced thinly lengthways
  • 1 yellow or red pepper, sliced thinly
  • 1 tomato
  • 1 avocado
  • Salt and pepper

Method:

Start with the veggies. Pre-heat the oven at 200C/400F/gas mark 6 and line up your sliced zucchini and pepper on a baking sheet. Brush with a little olive oil and place in the oven for around 10 minutes or until they soft and brown around the edges.

DSC_1298

DSC_0024

Like this!

Now, lay out a layer of cornstarch on a plate and place a slice of the tofu on it. Coat all the tofu pieces with plenty of cornstarch and set aside – there is no need to dredge them in milk first as the natural moisture of the tofu will suffice. Sprinkle them with a little salt.

DSC_0001 DSC_0003 DSC_0006

Heat about two tablespoons of oil in a pan on medium to high heat. Fry the tofu on both sides until golden brown. This may take about 7 or 8 minutes on both sides, just watch them carefully. The coating will become lovely and crispy.

DSC_0010 DSC_0022

When they are done, cut each piece diagonally so they fit better on the sandwich.

DSC_0034

You can see here the benefit of pressing the tofu before-hand. It remains firm through cooking and when you bite into it, the texture is just perfect! Now you’re ready to assemble!

DSC_0025

Start with the veggies…

DSC_0028 DSC_0031

…and then the tofu cutlets…

DSC_0035

…then the tomato and avocado! Sprinkle with salt and pepper and you’re done.

DSC_0038

DSC_0041 DSC_0050

I’m telling ya… crusty bread, creamy avocado, crispy tofu, juicy veggies – try this today!! Happy Vegan MoFo-ing everyone!

Tip of the Week: How I Drain and Press Tofu – VeganMoFo

DSC_0347 (2)

I thought I might make a quick little post for all those new tofu users out there! We are growing in number! Many of you may have come across a recipe that instructed you to ‘drain and press’ your tofu. Now this will almost always refer to firm tofu, not silken tofu – because if you did this to silken tofu you would have a serious mess to clean up!

My next post will be a great example of how to use tofu that has been pressed (shh…it’s tofu cutlets!). Pressing tofu is a great way to ensure that when you cook the tofu it remains firm and the texture is never too sloppy. Draining also helps the tofu absorb more of the flavours you mix it with.

Method:

  • To begin, take your tofu out of the packet keeping it in one piece. Holding it over the sink or a bowl, gently squeeze the block to remove excess liquid.
  • Now place on a board and slice it in half lengthways.

DSC_0345 (2) DSC_0347 (2)

  • Now you’ll have two pieces like above. Wrap these two blocks in paper/kitchen towel a few times over making sure that the surface on top is level. Place another board on top.

DSC_0349 (2)

DSC_0350 (2)

DSC_0351 (2)

  • You will need to place a heavy weight over this board to do the ‘pressing’. I find that a stack of my vegan cookbooks does the trick! You could also use a pot filled with water – just make sure that the weight is evenly distributed.

DSC_0353 (2)

  • Leave the weight to press the tofu for around 10 – 20 minutes, depending on how much time you have. The longer you leave it, the firmer and tastier it will be!

DSC_0022

Ok here’s a little preview of how I used this tofu – will be up tomorrow! Happy tofu pressing! 🙂

Raspberry and Almond Tart – VeganMoFo

I’m one of those people who get all excited over a new cookbook, make one dish from it, and then allow it to collect dust on my window sill. That’s not to say I make poor choices when I buy cookbooks, I guess I just get distracted easily! So today, I’m not getting distracted! I’m going to share a recipe with you that I found in The Ultimate Book of Vegan Cooking.I changed it ever so slightly as I found that the original did not hold together as well. If you don’t have or like raspberries, I’m sure many other fruits would work.

DSC_0223

Makes: One 20cm flan tin

  • 200g shortcrust pastry
  • 125g silken tofu
  • 1/3 cup soy cream
  • 1/4 cup agave syrup
  • 1/2 cup ground almonds
  • 2 teaspoons arrowroot
  • 2 tablespoons vegan butter
  • 2 cups fresh raspberries

Method:

Line a 20cm flan tine with the shortcrust pastry. Use a fork to prick the base all over and let it rest for about 30 minutes. Pre-heat the oven to 200C/400F/gas mark 6. Now put the tofu, cream, agave, ground almonds and arrowroot into a large bowl and whisk briskly until combined. Melt the butter in a pan and then pour into the mixture, stirring until everything is combined well.

DSC_0200

Sprinkle the raspberries over the pastry evenly and then pour the tofu mixture on top. Spread it out nice and evenly so you can still see some of the raspberries on top

DSC_0204

Bake in the pre-heated oven for 25 minutes and leave to cool for about 10 minutes.

DSC_0207 DSC_0212

This is lovely on its own or you could serve it with some vegan ice cream! Yum! Enjoy guys 🙂

DSC_0227

Vegan Spanakopita! – VeganMoFo

DSC_1225

Hallelujah! Sweet baby Jesus, Mary and Joseph. These are just a few things that went through my head as I dug into one of my all time favourite dishes – veganised! I had been wanting to try and make vegan spanakopitas for a while and I’m so glad I did. I used a blend of vegan cream cheese and firm tofu to make the ricotta/feta style cheese that is usually used and it turned out SO well!

Makes: Around 14 – 18 triangles, depending on how large you make them

  • 1 packet phyllo pastry
  • 1/2 onion, chopped
  • 3 spring onions/scallions, chopped
  • 2 cloves garlic, crushed
  • 1 large bunch of both parsley and dill
  • Approx. 450g fresh baby spinach, washed and dried well.
  • 1 tub vegan cream cheese
  • 1/2 packet of firm, pressed tofu
  • 1 tablespoon nutritional yeast (optional)
  • Salt and pepper
  • Oil for brushing

DSC_1190

Method:

Mix together in a medium bowl the cream cheese, tofu, nutritional yeast (if using) and some salt and pepper. Mash this with a fork until you have a crumbly like texture. Now you want to saute the greens – start by heating some oil in a large wok or frying pan and toss in the onions and garlic. After they have browned a little (a few minutes) add in the spinach and herbs.

DSC_1195DSC_1199

After the spinach has wilted, add to the pan your tofu and cream cheese mix. Stir to combine. Now remove from the heat and allow to cool down a little. Pre-heat the oven now for 350F/180C/gas mark 4.

DSC_1201

To make the triangles, lay out your pastry and cut lengthways into thirds or half, depending on how large you like your triangles. Brush the sides with oil and place a heaped tablespoon of mixture onto the bottom right corner. Now take that corner and fold over the mixture to the left and then take the new bottom left-hand corner and fold directly up so that corner stays to the left. Now repeat the process until you come to the end. Sounds tricky? It isn’t, check out the photos!

DSC_1209

DSC_1211DSC_1217 DSC_1218 DSC_1219

Assemble on a large baking sheet, brush with a little extra oil and cook in the oven for about 20 – 25 mins, or until they are golden in colour.

DSC_1221

These are so delicious and stay well until the next day so they are great to take to a party or dinner. Everyone will love them!

DSC_1222

The Incredible Vegan Frittata!

Behold! A vegan masterpiece! No, I am not exaggerating; this beautiful frittata/quiche has been a while in the making and after many attempts I have finally formulated the perfect recipe! The vegetables can be shuffled around a bit, for example – potatoes are really good in this and any green leafy vegetable or member of the squash family would work also. Instead of using normal pastry for a crust, I used brown rice which tastes divine, is way healthier and makes this dish gluten-free if you use tamari instead of soy sauce 🙂

DSC_0757

Makes: 1 8″ springform pan – enough for 4 people

  • 1¾ cups cooked brown rice
  • 1 egg-replacer (you can use flax, I used Orgran egg replacer)
  • 1 yellow pepper, chopped
  • 1/2 an onion, chopped
  • 4 spring onions/scallions, chopped with the white and green parts separate
  • 4 cloves garlic, crushed and chopped
  • 3 mushrooms, chopped
  • 100g chopped kale
  • 100g baby spinach
  • A large handful fresh basil leaves
  • 1 package firm tofu
  • 2 teaspoons Dijon mustard
  • ½ teaspoons turmeric
  • 2 tablespoons soy sauce (or tamari if gluten-free)
  • 3 tablespoons nutritional yeast
  • 2/3 cup soy or almond milk
  • 2 teaspoons arrowroot
  • 1 tablespoon olive or vegetable oil

DSC_0643

Method:

For the crust, pre-heat your oven to 375/190/gas mark 5 and lightly grease your springform pan. Mix the egg replacer with the cooked rice and then press the rice into the bottom of the pan. Brush the top with a little oil and place in the oven and cook for 10 minutes. Take out and leave to the side. Turn the oven down to 350/180/gas mark 4.

mosaic0c4b645ce3f90c85d67e31cacb0bb7eda05d91c8

Now heat some oil in a frying pan and cook the onion, white part of the scallions and the garlic until they are soft. Add in the pepper and mushrooms and saute for about 10 minutes.

mosaiccff4a8b66f46045a0314630226a3b279cff00b10

After this, add in the spinach, kale, basil and green parts of the scallions. You may have to do this a little at a time as they will have to wilt down a bit to fit in the pan.

DSC_0667

As they wilt, turn the heat down to its lowest setting and start with the tofu mixture. For this you will add to a food processor or blender the tofu, mustard, turmeric, soy sauce, nutritional yeast, milk, arrowroot and oil. Blend until you have a smooth consistency.

mosaic42c72aa6f5a788be8bed36e187c8e234dffa3bee

You see what’s about to happen, don’t you!

DSC_0681

Pout the tofu mixture into the greens and stir until everything is combined. Now pour this into the brown rice crust and bake in the pre-heated oven for 40 -50 minutes, depending on how deep or shallow your dish is. Just check it after 35 minutes to make sure it’s not too brown.

mosaic0163d96b6e61dffa15808541647628d79076e374

It should look something like this!

DSC_0717

Leave it sitting for about an hour before taking off the sides of the pan. Once you do, allow it to cool before slicing as this will make it set further. I put mine on the window sill as it has been a little chilly here today 🙂

DSC_0766

Enjoy with a salad for breakfast, lunch or dinner! If you want to eat it hot, just pop it back in the oven to re-heat.

DSC_0743DSC_0764

Check out how ‘eggy’ it is!

DSC_0797

Previous Older Entries

Blog Stats

  • 444,660 hits